170402 0679-01 6912291
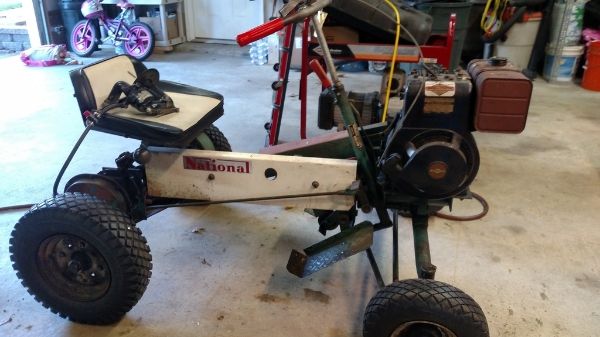
Machine Serial: B 30-2743
Machine Model Unknown.
So I have this machine, the first machine I can remember as it was purchased by my dad and I learned how to mow the lawn on his lap with this machine. A few years ago, before I had the help of you fine folk or the knowledge I possess today, I had it running for a bit but not well.
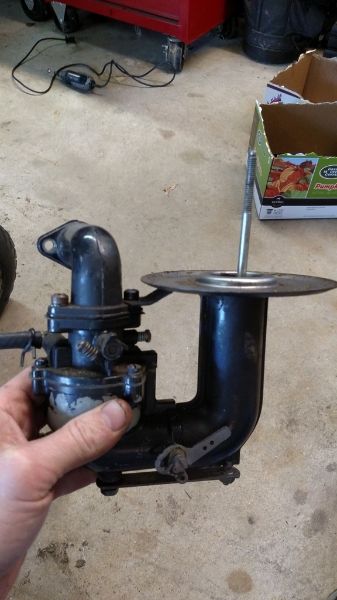
This has a flowjet type carb that I did a kit on but fouled her up apparently during the process because I had to install a fuel shut off to prevent a fuel leak after shutting down.
So today, I pulled it out of the shed since I've developed an obsession and don't currently have anything to work on.
I thought the prudent step would be to verify proper compression, given the age, so I did a leak down test. My compressor put in about 88lbs with 80 on the out side, so I'm guessing that's about 8-9 % loss, which is acceptable based on what I've read. Actually, I think that's pretty good given the age of the engine.
I checked out Briggs site and I think the engine was manufactured in 1969.
Spark was good but I figured I'd clean the coil and magnet on the flywheel anyway since I figured it could hurt.
I'm about to dive into the carb again because it's been a few years since this thing ran.
I was wondering if anyone had any advice as I begin, working on a machine this old. I really want to get this one going and am willing to spend money. I can't seem to find the carb and if I did, I'm sure it would be expensive but am willing to spend the money given the history.
The reel assembly, as I'm sure you've noticed, has been removed. I got rid of it as it was a hazard to my small children and super expensive to sharpen. I plan on using it as a tractor or just ride it around for fun.
I've attached some pics.